
Chloroplast transformation by biolistic bombardment
Published:
Standard protocol for the transformation of the Chlamydomonas reinhardtii chloroplast using biolistic particle bombardment. Adapted from a protocol shared by the lab of Alison Smith (University of Cambridge). Used for the transformation of Chlamydomonas in a recent Mackinder lab publication, supported by work from collaborators.
last updated: 28/06/24
Before starting
Materials
*Essential
- *Macrocarriers (Bio-rad; #1652335)
- *Microcarriers (0.6 µm gold nanoparticles) (Bio-rad; #1652262)
- *Stopping screens (Bio-rad; #1652336)
- *Rupture disks (Bio-rad; #1652329)
- *Precipitation buffer (2.5 M CaCl2, 100 mM spermidine, dissolved in TE buffer.)
- Ultrasonication bath
To prepare
- Autoclave stopping screens and macrocarrier holders.
- Ensure cells are healthy and mid-exponential on the day of shooting.
Additional notes
- The minimum concentration your plasmid can be for good transformation efficiency is 75 ng µL-1.
Protocol
Preparing cells
- Grow cells to mid-exponential phase (2-8x10⁶ cells mL-1).
- Centrifuge (1000 g, 5 minutes, RT) and resuspend to 1x10⁸ cells mL-1 in TAP media.
- Plate 50-100 µL (5-10x106) cells in the centre of a plate with the correction selection media (100 mm petri dish). Manipulate the plate such that the cells occupy a circular area with a radius of ∼2 cm.
- For spectinomycin selection, cells can be shot on TAP + 150 µg mL-1 plates.
The plates should look similar to the below example:
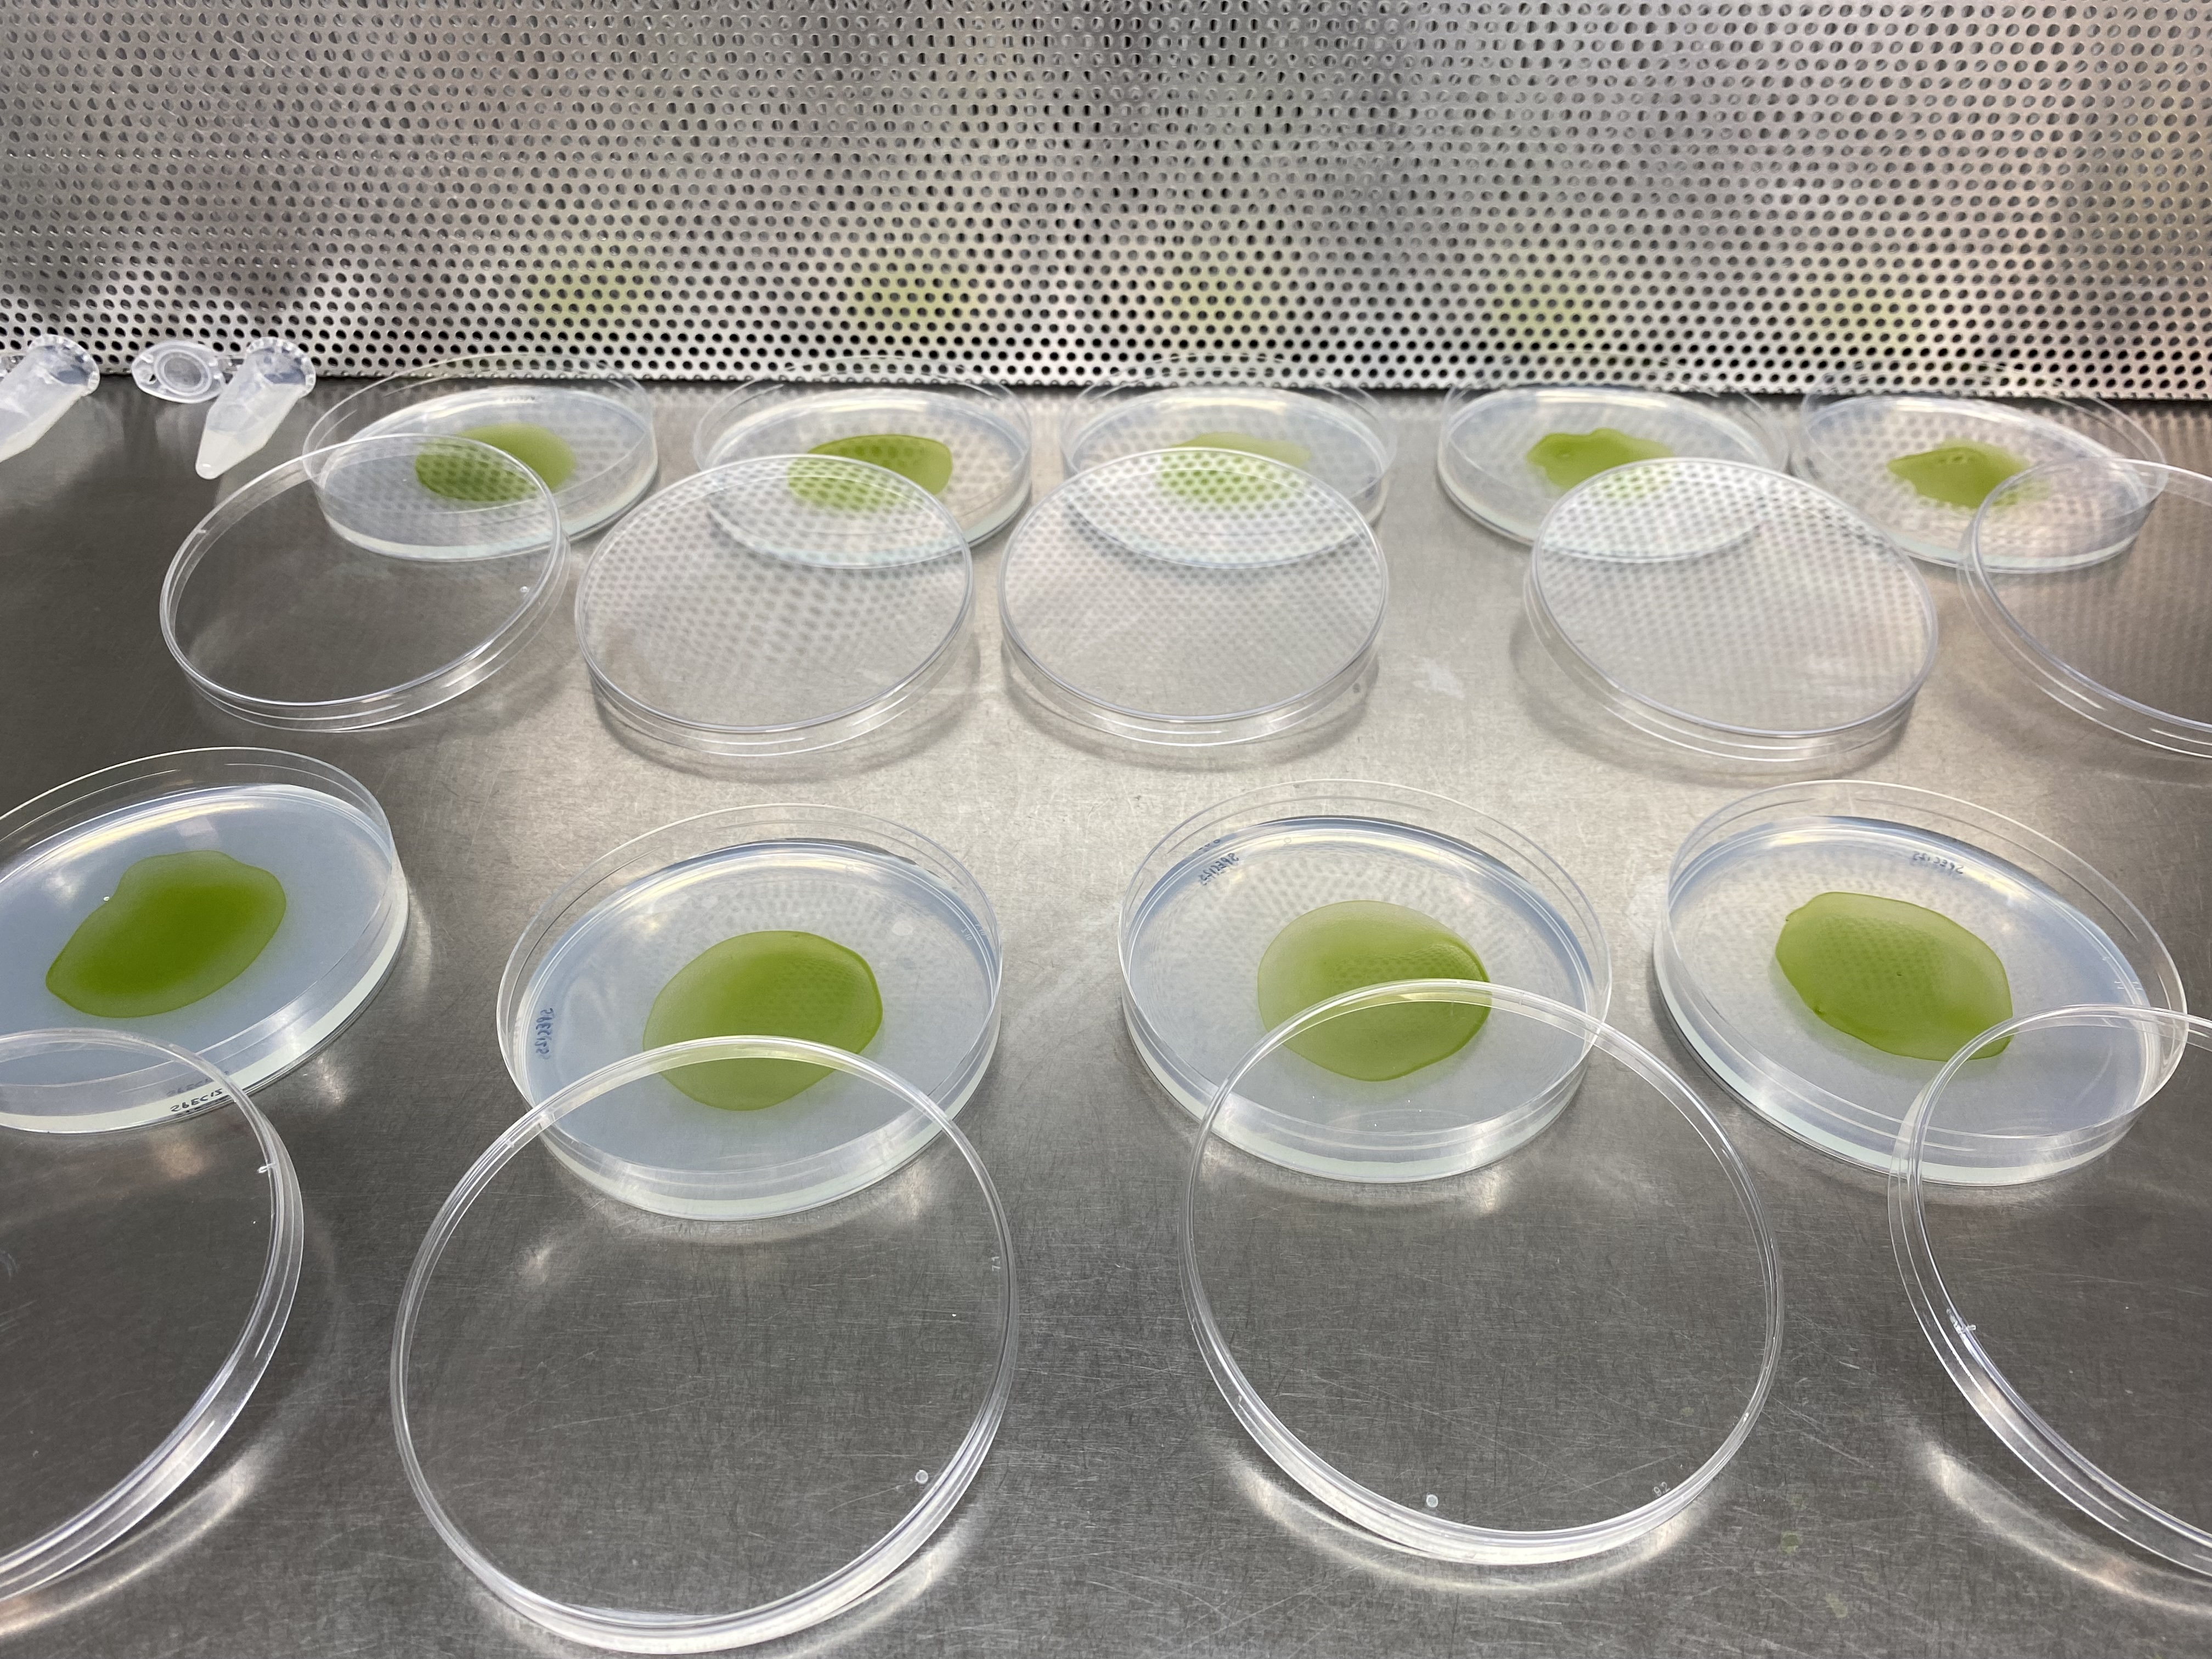
- Allow plates to dry.
- Cells can be transformed biolistically as soon as they are dry on the plate. Do not attempt to shoot prior to drying, as very poor efficiency will be observed in ‘damp’ regions.
- Alternatviely, the plated cells can be incubated in low light for several hours or overnight. Don’t let cells grow longer than this, as it will affect the selection process after shooting.
Preparing DNA-coated nanoparticles
- Resuspend gold nanoparticles by flicking the tube, vortexing (∼10 seconds) and briefly sonicating (∼1 minute) in an ultrasonic bath.
- Aliquot 0.5 mg of gold nanoparticles (10 µL; usually supplied as a 50 mg mL-1 suspension) for each biolistic transformation into 1.5 mL eppendorfs.
- Add 500-1000 ng of plasmid DNA per transformation.
- Add water such that the final gold concentration is 30 mg mL-1.
- For a single transformation, the final volume should be 16.6 µL, of which 10 µL is gold.
- Add an equal volume of precipitation buffer, vortex briefly (∼10 seconds) and let stand at RT for 3 minutes.
- Centrifuge for 5 seconds at 7,500 g.
- Remove supernatant and resuspend in 500 µL of cold, 100% ethanol.
- Resuspension after precipitation can be difficult, and flicking the tube agressively is often the best way to resuspend the particles.
- Centrifuge for 5 seconds at 7,500 g.
- Remove most of the supernatant, leaving ∼10-15 µL per bombardment.
Preparing for shooting
- Sterilise a macrocarrier and rupture disk for bombardment in 100% ethanol.
- This can be done in a petri dish filled with a shallow volume of ethanol. The rupture disks can be left in ethanol until immediately prior to shooting.
- Once sterilised, remove the macrocarriers and allow to dry in a laminar flow hood.
- It is useful to blot away the excess ethanol from the sterilisation by touching the side of the macrocarrier against some blue roll.
- The macrocarriers can be rapidly dried by placing at the circumfrence of an upturned petri dish lid, to allow air circulation at both sides of the carrier.
- Sterilise the inside of the biolistic bomardment instrumentation with 70% ethanol.
- Ensure that the macrocarrier holder and stopper screen holder are both thoroughly sterilised to prevent cross-contamination from previous transformations.
Shooting
- Briefly (~30 seconds) sonicate the DNA-coated nanoparticles in a floaty in an ultrasonic bath to break up any larger particles.
- Dispense the sonicated DNA-coated nanoparticles onto the macrocarrier and allow to dry in the laminar flow hood.
- Place the macrocarrier into the macrocarrier holder, such that the nanoparticles are facing away from the metal.
- It can often be difficult to get the macrocarrier to sit well in the holder. Using some 70% ethanol to wet the holder can prevent the macrocarrier from springing out.
- Place a metal stopping screen into the holder.
- Invert the macrocarrier holder (nanoparticles now facing down) and place over the stopping screen. Screw the retention ring over the assembly.
- Place the assembly on the top slot of the biolistics instrument.
- Place a rupture disc in the holder and screw firmly onto the nozzle.
- If the holder is not tightened sufficiently, the rupture disk can squeeze out through the threads instead of rupturing, resulting in very poor shooting efficiency.
- Place a TAP plate two shelves below the macrocarrier assembly, ∼10 cm from the macrocarrier, as below:

- Remove the lid of the plate, close the door and turn the vacuum on, with the biolistics intrument set to ‘VAC’.
- Sometimes the door will fail to seal alone, but can be persuaded by applying some force at the hinge side.
- Once the pressure has built to 27/28 mmHg, quickly flick the switch to ‘HOLD’.
- If you find the plate moves during this process, a piece of damp blue roll can be placed under the plate to prevent the movement.
- Open the valve supplying the helium and flick the switch to ‘FIRE’.
- The pressure will build to just below the pressure rating of the rupture disks before rupturing.
- Flick the switch back to ‘VENT’ and wait for the vaccum pressure to return to 0.
- Replace the lid and remove the plate.
- Thoroughly clean the macrocarrier holder and assembly, then replace the stopping disc and rupture disc before the next bombardment.
Recovery
- If the correct number of cells have been used, and the selection is sufficiently strong (e.g. spectinomycin or photorophic recovery), the plates can be left to recover directly following shooting.
Homoplasmy
Following recovery (∼2 weeks), colonies need to be restreaked to homoplasmy
- Restreak 8 individual colonies from each transformation.
- For spectinomycin selection this is completed on TAP + 250 µg mL-1 plates
- Repeat this 3 times (4 total restreaks).
- Check for homoplasmic inegration of the transgene using primers flanking the insertion locus.
- Ordinarily homoplasmy is reached after 4 restreaks.